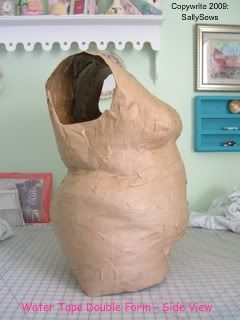
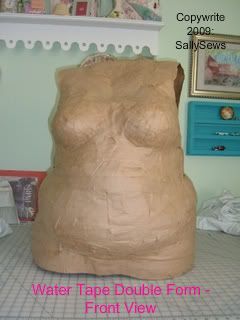
Gulp, the title of this post is quite accurate. I am sharing with you the water tape double form I made in September. Of course, this means that you know exactly the proportions of your body, no hiding now - I now know how big my rear is!
I took a class at the American Sewing & Craft Expo in Novi, Michigan last September that supported you in creating one of these forms. It was actually a fun class, and I was partnered with two funny ladies from Michigan to each complete these forms.
The leader of the class was Jan Bones, who has led many many such classes. If you click on her name, you will go to the website. On the left hand column, the third title is "DRESS FORM INFORMATION". This provides views of other dress forms and info on purchasing Jan's instructions for making this form. Jan also designs the Lingerie Secrets line of patterns.
You need to purchase some gummed tape. I found this on an art supply website, so you should be able to find it where ever you are.
| Gummed Paper Tape | |
| 2"x75' gummed paper tape. Brown "craft" color; moisten with water. Easy to cut with scissors or craft knife. |
Briefly, you need at least one person to assist you - two is better. You cut the roll of water tape into reasonable lengths, preferably several that will go around your hips and waist. You don a piece of plastic (from a dry cleaners) and start with a round or two of the tape at the waist. This sort of anchors the process. Just like the duct tape form, you the proceed to cover the entire neck to upper thigh area, building up two or three layers of the tape. Don't soak the tape - put some water in a flat pan, and a sponge in the water. You can then slide the tape across the sponge to wet it. Edit 2/8/09: Once it is covered as much as you think worthy, you can use hair dryers to blow dry some of the wetter areas.
When you have a good shell that is mostly dry, you must cut in as straight a line as possible down the back of slip the shell off of your body. Before you do that, make a line across the cutting area in several spaces, so you can match it. You should staple it together along about 2 inches at the top and bottom, and a few tape areas across the body that will hold that shell together. You then hang it upside down (important) from a couple of ribbons pinned to the form, so it will dry.
Once you are done, and it has dried, you can then cut smaller pieces of tape and close that seam at the back. You should also use smaller pieces to reinforce the arm holes, bottom and neck (I elected to "fill in" the neck). Jan said you can put it on a hanger and use it as a form in this way, put it on a pole, etc.
She also suggests covering the brown paper - paint, decoupage, a knitted cover, etc. I haven't gotten that far with mine as yet.
A few more points: this is sturdier than the duct tape, you don't have to "stuff" it, and it will hold its shape quite well. Jan said that because it was created on top of your body, it accounts for some of the ease that you would normally include in a garment. So you should consider that when using the form.