Showing posts with label DIY. Show all posts

Sunday, March 28, 2010

more fittings

True to my word I have taken the really wrong pants out of circulation and have been dissecting the pants I put in the could be better pile.


First up a quick fix. These jeans were OK, a bit big but not enough to either jetison or bother with a major renovation. But really it was their colour that didn't work for me so I tossed them in the washer with a couple of packets of black dye and voila, much improved. I try not to have an all black wardrobe, but can't argue that with my colouring, I really think darker colours work better for me.


Next I tackled the jeans I made myself in February. While I was pretty happy with these, I wasn't 100% - particularly with the waistband. Since I decided to pull it off, I took the sides and the back seam in a little while I was at it. I would have fiddled with the leg inseams too, but with a whole lot of top stitching as well as regular stitching to fight through, and a fit I was pretty happy with I called it a day. I redrew the waistband, particularly the back section, and re attached it. A better fit and more comfortable. I bought a piece of cheap denim when I was out on the weekend so my next step will be to go back and redraw all the modifications on the pattern (including the leg inseam modifications I thought I should make but didn't) and then make another pair to check that I have it right.


Although the 'after' pictures on the right look much lighter, these are indeed the same pair of wide leg black bengaline pants. I removed the wide, shaped waistband, took in the side seams, took in the leg inseams (more from the back than front) and re sewed the crotch. I took in the waist band and then sewed it back on. I think these are much better (though still not perfect!)


I took off the waistband, took in the side seams, took in the leg inseams and took quite a bit out the backseam all the way through the crotch, took in the waistband and then reattached it. pretty much teh same as above - lots of improvement, not perfect but certainly closer to the right fit.

I was tempted to set to on a skirt I wore the other day, but I managed to stop myself in the nick of time. I thoroughly recommend this focus on a single garment thing. I really feel like the subtleties of fit are much easier to see if you aren't distracted. I've also gotten a lot from a few books about fitting and alterations, such as Fast Fit, which demonstrates a range of common alterations for body shapes and problems. Very worth while.

Thursday, November 26, 2009

plus size vintage and the daily wardrobe peek

There's an interesting discussion over on Gertie's blog about what is plus size anyway. You might want to check out her blog if you like vintage stuff, she's working her way through Vogue's guide to better sewing from 1952 and has done a few posts about fit and adjustment and sewing from vintage patterns. She's doing really well at including the plus size angle in an area notoriously small sized! (Thanks to Kate for putting me onto her!)

And while we are on sites I am currently loving, I am addicted to frocks & frou frou. Lilli posts great clear pictures of her fabulous and extensive wardrobe, plus info about where she buys and some shopping experiences. Already through her site I've finally found some really good reasonably priced leggings (sadly they are currently out of stock of larger sizes but I am sure they'll be fixing that soon). Lilli is not as big as me but I just love how she dresses and her extensive shopping knowledge. I'm hoping she'll head over here and do a few posts on Large for us. (Thanks to Kim for discovering this site for me!)

Tuesday, November 10, 2009

dress forms

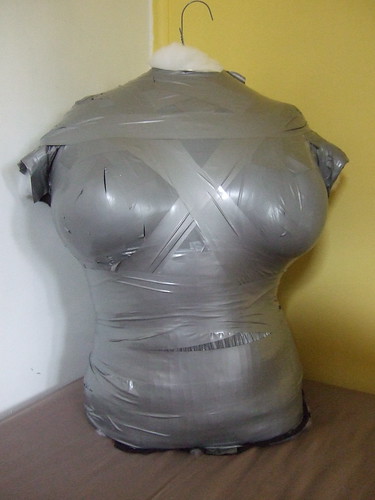
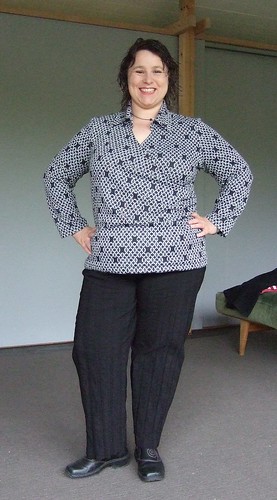
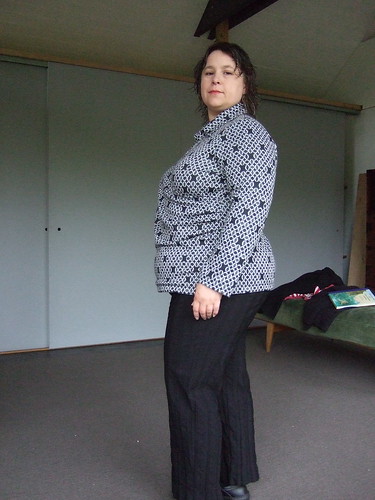
You may recall the fiasco that was 
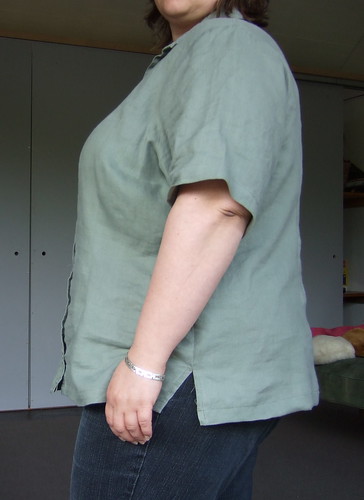
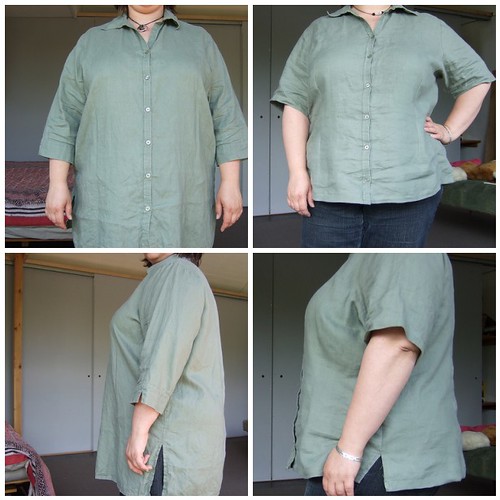
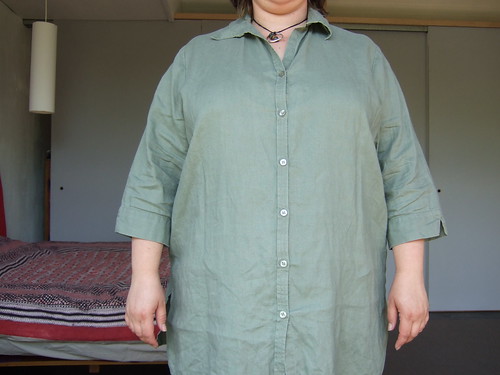
my attempt to make a duct tape dress form. Needless to say it hasn't been used and I have no desire to reproduce the experience or making it, even with the superior gummed tape. But my desire for a dress form just grows. In recent months I have been doing a lot of refashioning and making garments without patterns and this involves a lot of taking half finished and pinned pieces on and off and attempts to fit things in a mirror. Hardly ideal!

Previous attempts to locate a dress form in my size has proved pretty fruitless. All the ones I found online were overseas and offered by companies that don't ship internationally. I did find one, but the customer reviews about the quality of the mechanisms for adjusting it were so scathing I was convinced it wasn't a good idea.

I did find an aussie ebay seller who imports dress forms and sells them at a reasonable price, but their larger size was just a fraction too small for me. Despite supposedly fitting up to size 20, the measurements are smaller than mine and I wear a size 18. Yet another dead end!

And then it occurred to me to ask my local fabric retailer if she could order in dress forms in larger sizes. While she didn't have the size known as fuller figure, the manufacturer of the style she had on her books did make it so she said she'd find out for me. In the same instant it dawned on me that getting it back to Melbourne would be a bit of a pain so I rang a couple of places in Melbourne to make the same inquiry. Experience so far tells me that there is a lot of price variation (I have been quoted between $195 and $395 for the exact same thing!) so I decided to do my research on this one. Clegs came back to me fastest and they could get me a fuller figure, though at $395 I was looking at a fair bit more than I thought I would have to pay.

I also realised that while all the forms I have looked at are made by the same manufacturer, Clegs only carry the supafit model, while my local store and my favourite store, Tessutis only stocks the Diana model. In searching for reviews it seems the Diana is a sturdier and easier to adjust model with a better stand, and it was the short comings on the supafit that I had read about with the very first place I looked to buy.

But a side benefit of trying to find reviews and comparisons of the different models (through this fantastic sewing forum discussion site) I found a long thread about padding out dress forms. Not only does it seem possible, but most of the experienced hands recommend padding as a way of achieving a shape closer to your body. You see adjustability to the right measurements is one thing, but mimicking the distribution of those measurements on your body is a whole other thing. Those who hadn't padded their forms repeatedly posted that their dress forms never got used while those who had made their forms look more like themselves found them really useful. And of course if you are going to pad it out, you want the actual form to be smaller than yourself.

So now I am contemplating buying one in the easier to get smaller size and doing the work to make it look as much like me as I can! I'd love to hear from anyone about their experiences padding models out, reviews of different models or recommendations of places to buy.

Edited to add -

I just read through another tutorial on fitting a form to your shape (thanks for the link Nichola!) and found a couple of interesting things. The first is, the author recommends distributing your padding more evenly than you are in reality and claims this will make your garments look better. I'd like to know how, so I'm posting a comment and will let you know!

The second thing I found was that reading through the comments section there are recommendations for two form types I hadn't come across. Unlike the standard dial adjustable types I've looked at, the Fabulous Fit has a solid base with a padding fit system and removable cover. This means it is adjustable by size and shape and saves you the trouble of making your own padding and cover to fit. I gather this is the kind of form used by professionals and I can see why. Sadly, it stops at an American size 16, but the Uniquely You, which has many similarities goes up to a 50" hip with adjustments via the covering. And this company ships to Australia! Of course, while the form is only $139, the shipping here is $254.38!!

But aside from the issue of cost, another comment got me thinking about another problem. I hate how if ever I buy commercial patterns I measure myself accurately and find that the pattern size chart says I'm a size 26 or so. I know I may choose a size 18 or 20 in commercially made clothes, but the pattern says that for my measurements I need a size 26. If I make the garment in the size 26 (don't laugh - I've done this!) it is of course miles too big. I don't know why this is, but I basically don't use commercial patterns so I avid dealing with it. But it occurs to me - what if the dress form is the same? What if I buy one and find it is way too big? One commenter on the above post had exactly this experience and I can't imagine what I'd do if I paid $250 shipping only to have to return it!

Anyone else been down this road and know what I'm talking about?

Saturday, October 24, 2009

another shirt renovation

You might remember a shirt I altered last year. http://farm4.static.flickr.com/3138/3033349556_ba574434af.jpg

Well, I've done another one, this time in a quite different way. I started with the exact same linen shirt (except in black this time instead of olive) and ended up with a fancy shaped and detailed top.


You can read more about what I did over here (scroll down to the second half of the post.)

Saturday, September 26, 2009

sewing with knits

For all those who wanted to know more about the sewing of the bathers, I did a post on my other blog with some info about sewing with knits. Happy to answer any questions!

Thursday, September 10, 2009

in the swim of things


I'm so seventies, originally uploaded by Soozs.

I know, I know. Summer time means dealing with swimwear. Few things fill me with dread quite like the annual reality check like no other.

Pass the choc chip cookies while I have a sigh and maybe a cry...

For years I did my best to hide in a black one piece, but it's always been hard to find a suit I liked and which fitted me and didn't squish my boobs down to my navel.

I can't remember when I sewed my first suit, but it was a long time ago and a move motivated by sheer desperation. How hard could it be? I thought to myself and set out with cotton lycra and lots of time. No pattern, just winging it.

Those early suits were really quite OK once I had recut, re-sewed and altered for a day or two. I tried making my own patterns, but since no two pieces of lycra are the same a healthy amount of fiddle is always required.

And then five or so years back I discovered the tankini and I was pretty happy to stay there. Nice boy leg black pants in chlorine resistant lycra and a tank top with an in-built shelf bra. I'm not saying I looked like a model or anything, but they were comfortable and serviceable.

But as the tank began to age and the straps began to loosen, the cleavage got a little deeper than I was comfortable with. In bathers as in most of my clothes I like firmness and any possibility of a wardrobe malfunction does not assist in relaxation.

So the tank remained in circulation, but wasn't really what I wanted. I was also increasingly finding it hard to avoid sunburn and was thinking perhaps it might be time to seek a little more coverage - a rash vest and board shorts were the next additions.

I don't know if it is just me and my shape, or whether this is a universal phenomenon, but I find board shorts really uncomfortable. I like the sun protection, but they seem to be loose and flappy and extremely unflattering at the same time as restrictive and tight whenever you are trying to move.

And the big black rash vest is eminently functional but somehow unsatisfactory too. Hopeless for feeling remotely summery or attractive and when sun isn't a big problem, unnecessary levels of coverage. Plus I really can't get over the need for a dedicated swim bra.

So now I find myself with no less than 5 pieces of swimwear, pretty much all of which are a compromise in some way or another. Now that I am spending a good slab of time living at the beach, swimwear is a daily reality.

Armed with a load of lycras in interesting prints I am setting out to remake the swimwear wardrobe. I'm boldly going away from black because I'm tired of it.

This is the first of the items I had in mind, a short sleeved rash vest. I used the same pattern that I use to make most of my T-shirts. After a trial wear this morning I decided it needs a bit of shortening and I might hem the edges instead of leaving them overlocked, but otherwise a much more pleasant garment to wear than the old rashie.

Next up, some hybrid bike/board shorts. I want something that looks more like regular shorts (ie less clingy), but has the stretch and comfort of lycra. I'm planning on using the jazz pants pattern I used over here.

After that I'm going to make a new tank and perhaps even a one piece just for the hell of it.

So how to you deal with swimwear? Do you make or buy? What kind of swimwear do you like? Where do you get it?

Tuesday, June 9, 2009

a lesson in fit


new clothes, originally uploaded by Soozs.

OK so this weekend I went to craft camp and I made a complete shit load of stuff. Woo hoo! (You can read more about the weekend here, and head over to flickr for better looks at the garments in the mosaic).

But aside from the obvious benefit of new gear there were some less expected wins. Firstly I made more than one style of pants in a sitting and that gave me a really good opportunity to think about the more subtle aspects of cut. I also made the same pants in three different fabrics and two different lengths, and that was an interesting exercise too.

And so much sewing time at a stretch made it easier to devote time to some riskier projects, knowing they might not work out, and a because I am in the dead of winter but will be in the heights of summer in just a few weeks I covered a really wide array of fabrics and garment types.

So just a few things really stood out for me like how much more flattering a firmer fabric in a more fitted style is - look at the short sleeve shirt in the second to bottom row on the right or the black tunic vest in the middle row on the left and compare them to the olive over top to the left of the shirt or the stripe top over jeans in the top row.

I also think my fear of pants and skirts in too light colours may be unfounded (second and third rows on left), but my general aversion to small scale prints may be best listened to (though I think the T-shirt to the right of the grey pants is OK - perhaps because it is more fitted?).

A jeans style of cut suits me more than a more conventional pants leg (look back at previous pants here) and lots of layers and pieces in variations of a greyish scale work well for me, though a splash of red does wonders (you can't see it here but I had a red scarf on in most of the shots).

I love the tunic - this was a no pattern experiment and I think it really worked. It is made out of a woven rather than knit cotton spandex two way stretch so it is firm and sits very well but is super comfy too. I started with a quite unstructured box and added in bust, shoulder and back darts and then did the front shaping with rows of fine pin tucks where a conventional front dart would be. I will definitely be making another of these - I want to wear one every day!

All over I feel quite invigorated on the wardrobe front as a result, and I think future sewing will be very influenced by what I've learned. As always I used an array of Ottobre patterns to great effect and continue to be very happy with them.

Sunday, April 19, 2009

winter approaches, out come the needles

I've just recently finished the Hey, Teach! cardi for myself, and I am really pleased with it. I think I could go for this short sleeve with long sleeve T underneath look.I mostly lack the confidence to knit myself garments beyond hats and scarves, since they so often fit poorly or look wrong in some way or another. It is such a huge investment of time and money I tend to play it safe. But this one has really shifted my attitude.

In part I think it has come from a better range of pattern options out there. As a knitting teenager anything plus size was generally from a men's pattern, with drop shoulders and too long arms. I'm much more skilled at altering patterns now, but so many more patterns come up to an over the 50" bust mark. And more of them have shaping and detailing that makes it a really worthy project.

At the moment I am really interested in lace detailing as a feature and also in 'top down' construction because altering shaping is so easy and with no bulky stiff seams you get a much more flattering fit, plus there's no sewing and pieces to fit together. This free pattern looks good, and quite a few of the projects in Custom Knits really appeal (though the styling with so many photos of slim chicks in undies is a bit off putting).

Have you got a knit garment pattern to recommend? I'd love to get a little list together of great plus size patterns...

Sunday, March 1, 2009

new ottobre!

The new Ottobre 2/2009 for women is out now! (to see images click on the link, then click on the bottom right hand image and then on th cover image). No styling with plus size models in this edition, which is a bit of a disappointment, but some nice pants, tops and jackets and a well detailed pleated neckline that could be added to any kind of garment. I think Imight give it a go on a top.

I have been very quiet around these parts because I haven't been sewing or buying clothing (or even had my hair cut yet!), and I haven't made my new paper tape dress form (though it is definitely on my agenda).

But I think I will make myself some new pants with some very nice fabric I just bought. Since the one clothing oriented job I have done recently was to draft and test my pants block, I am going to do a little comparison. You might remember these pants I made last last year at craft camp, and how I though I should have had a bigger size. Since I really like the shape and all the detailing, I think I will trace it out int he 52 and compare the pattern to my block. Should be interesting. I will report back!

Oh, and the shirt from that post, the one I wasn't overly fond of is now black thanks to a little dye session. I might even wear it when I photograph the new pants...

Sunday, February 15, 2009

RAINY SATURDAY PROJECT


My favorite weekend sport is cruising for yard sales, and since I live in Southern California the opportunities are pretty much year round. (Except when it rains on Saturday morning!) I never used to look for clothing, figuring I wouldn’t find anything in my size. How wrong I was—once I started to keep an eye out for things to wear I was amazed at what I found. And the prices…ooh la la! Drop in at my blog sometime to check out my weekly finds (and the stories that go with them!).

I feel so fortunate to have all this thrifting treasure available here. But like many thrifters, I've been known to bring home great deals that weren’t so great because I never used the item. One of my goals this year is not to let that happen. So when it rained a couple of Saturdays ago, I used my normal garaging time to remodel this skirt and blouse I picked up last summer for a buck and a half.

They’re by Ulla Popken, and judging from her website would have been about $70 each retail. Rayon with embroidery and some tasteful sequins. The tag said dry clean.

I don’t dry clean.

I don’t like the smell of the chemicals, don’t think they’re healthy to be around, and I don’t like the cost. My frugal self can't quite see buying something for a dollar or two and then spending over and over to dry clean it. So any yard sale clothing that says dry clean, I hand wash. Almost never has this backfired, and the item or two that shrank just got donated. They weren’t ruined, just smaller!

The top on this set shrank selectively. After I hand washed and dried it on the line, it was a little snug, especially the sleeves. Heck, I thought, but then I started considering the skirt. I have short legs, so lots of skirts hit the tops of my shoes if I don’t shorten them or hike them up under my armpits. This skirt was quite long, and has a ruffled tier on the bottom—not a candidate for shortening at the hem. However, skirts can easily be shortened from the top.

I picked open the elastic waist on the skirt, cut off about 5”, sewed a new casing, reinserted elastic and voila, the skirt was a length I like. Then I picked open the side and underarm seams on the top and inserted the cut-off skirt material. I admit picking out seams is boring, but I did it while watching a movie so it didn’t drive me mad. Since the fabric is black, I fancy the addition is barely noticeable. And if anyone ever comments on it I'll just say yes, I did add in some fabric, aren’t you clever to have noticed.


So now I have this comfy and (I think) spiffy dress to wear.

Since I had a few scraps of the black fabric left, I was able to repair a bleach spot on the sleeve of another (twenty five cent!) We Be Bop shirt.


I appliquéd a small heart over it. Yes, wearing my heart on my sleeve, as the saying goes. I’m easily amused.

I used the same shorten-from-the-top technique a while back on this Jones New York silk skirt.

It was a couple of sizes too small, but cut on the bias and very long. This one has a set-on waistband, which I removed. Cut off a few inches at the top, put the waistband back on, inserted elastic, and now it’s my size and length. Which made me very happy, since I paid a whole dollar for this one!

Sunday, February 1, 2009

duct tape dress form


I've just done a post over on my blog about making a dress form out of duct tape (read it here.)

There's a few things I thought I'd add about it here specifically as a larger size issue.

I absolutely love the idea of having a dress form. I think one of the things that really lets plus size clothes down is poor fit and for getting this right, shape is absolutely critical. And of course, buying a plus size dress form is virtually impossible.

Making my own, as I detailed on the blog, was a trying experience and I am sure a significant part of this was a size issue. The relative strength and structure of the form just isn't as suitable to a larger size, and when you upsize everything in the process, it all takes longer and has more room for error. I think too, bigger often means more wobbly, so it is really hard to acurately capture your size and shape - too tight distorts, too lose makes it too big.

But if I can I think I'll give it another go. I'll get LOADS of tape and do at least 4 layers I think (maybe more in some bits), and make sure it comes right down over my butt.

I'd love to hear anything else from anyone about dress forms - duct tape or otherwise. Maybe we could organise a duct tape party and get a thing going...

Monday, December 8, 2008

the crane

One of the things I find really frustrating is how interesting patterns and garments so often don't come in larger sizes. It's bad enough that I find good jeans and T-shirts hard to come by, but when it comes to something a little more innovative I'm doubly disappointed.

And while in theory I can find great patterns and upsize them myself, somehow it is all the more scary. Stepping outside the box exposes me to a much greater level of scrutiny (if only by myself) and I feel like everyone will think I am deluded to figure I can carry off an unconventional look. If a skinny girl did it they might not agree with her taste but if a fat girl chooses a bad look, it is bad because she's fat.

One of the things I really like about the Pattern Magic books (check out the flickr group here) is the way they highlight techniques, rather than actual garments. Many of the highly unusual and challenging concepts contained in the books can be used in a wide variety of ways, making them accessible to all body sizes and shapes.

For example: this knotty skirt detail would work on any skirt, shirt or T-shirt hem, this woven construction is not at all size specific and these raised boxes could be placed anywhere on any garment.

My much thinner friend made the paper crane jacket from Pattern Magic (other examples here and here) and I really liked it. I liked how it looked but I also loved the incredibly clever construction technique (see a diagram here).

But I was nervous to try it. I felt it was most likely something that would look bad on me. I thought it might be a skinny chick's thing. With a little encouragement I took the plunge and although it took a few tries to get the sizing right (I started too big. Of Course), the end result is fantastic. Made from a cotton/viscose/elastine jersey (super cheap from darn cheap fabrics in Heidelberg) it is the ultimate flexible garment. I can throw it on over anything for an extra layer. It is light enough to fold up and carry in a handbag and it doesn't crease. The construction is so clever that once you have worked out your sizing it only takes an hour or so to make one.

And I like that it looks unusual without being bizarre. From the front it looks a bit like a wrap hanging off your shoulders, from the back like a loose cardi. Because the jersey grips a bit, you can pull up the shoulders and make it look much more like a jacket with a bunchy neck or let the sleeves pool down at the wrists and it feels much more wrap like. You can let the fronts hang open or pull them closed, you could add a closure pin or button if you wanted.

I'm not sure I would enjoy wearing a crane made from non-stretch fabric, since the pattern relies on a certain ratio between the hips and shoulder width to sit well in a stiff fabric, but the jersey version is now well centred in my wardrobe. And I have some black wool knitted rib waiting to be made into another one.

For this garment and the many other interesting ideas, I'd highly recommend a tour through the Pattern Magic books 1 and 2.

Wednesday, November 19, 2008

more from my wardrobe

Not much news today, just a glimpse of what I was wearing as I rushed off to work this morning all fuzzy headed from a cold.

I am totally in love with this shirt. I made it from the latest Ottobre magazine (can't remember the issue number maybe 5/2008?), size 52. I like that the collar makes it look smart and a bit more professional, but the thick knit fabric is really comfy and T-shirt like. I like the print too. I bought the fabric at Joy's Fabric Warehouse in Geelong and apparently it is an run off from a designer. The pants are from TS 14+ and I like them too. I had to alter them a little to lower the sides of the waistband, but otherwise they are a good fit. The fabric has some stretch, but also the vertical stripe you can see is actually textural and contracts the fabric too (you can see it a bit at the hem line in the top photos).

The shoes are yet another pair of Josef Seibels bought from Mountfords - same brand as the red shoes in the previous post everyone liked so much. These are medium priced shoes that are built for comfort and durability (I walk a lot and that combined with my weight makes for hard wear on my shoes).

Saturday, November 15, 2008

puff sleeves

I am not one for puff sleeves. They look awful on me and always have. And then a few months ago I started noticing them everywhere. On everyone. Large and small they seemed to always look great. So I decided that maybe it was time to re-examine my attitude.

I made the puff sleeve T from Ottobre 2/2007 (design 4) size 52. I slightly lengthened the sleeves since caps scare me a bit.
Link
And the result was truly awful. Wearing it, I looked like a full forward in drag (to borrow a line). I chastised myself for thinking I didn't trust my well honed instinct and figured it must just be my body shape, rather than size that made them so wrong.

And then a few days ago while I was out with a friend looking at clothes I went into Autograph to have a look around. This store is more miss than hit for me, a lot of the clothes are poorly made and not really for my shape. Plus I am usually between two of their sizes. But occasionally I find something or other in there that makes a good plain addition to my wardrobe. I noticed for example that they had very nice and inexpensive rash vests for the beach (where were they when I was forking out a premium for mine?).

Anyway, I decided to try on a whole stack of their tops, including a number with various types of puffed sleeves and different shoulder constructions. Although this seems like a really smart and obvious idea, I've never really done this exercise and it was really interesting.

All the puffed sleeves looked reasonably awful on me, except for one which looked totally fabulous! Sadly the top had other aspects which weren't so great, so I didn't buy it, but I took a good long look at why the sleeves on that top were better. The puff was minimal (more puff=more awful) and the fabric was soft, so the sleeves sat flat, not elevated. The sleeves were also loose and set into the shoulder quite high (ie closer to the neck). This somehow made my shoulders look both slimmer and yet somehow in proportion to my body, giving an overall pleasing effect.

So I felt a bit of hope, came home and pulled out the disaster T. I cut off the sleeves, narrowed the caps, cut in the shoulder and reset sleeves in. This reduced the overall size of the top of the T-shirt since I cut the previous seam allowance off rather than unpicking the seams, and the volume on the top of the sleeve (and hence the puff factor). I also made the neck opening larger.

And the result is great. The sleeves make it a bit more a 'top' and a bit less a 'T-shirt' so I could get away with wearing to work (the antique dollies care of my grandmother help too!).

With lessons learned I'd make the pattern again, perhaps cutting the top half of the T in size 50 and the hips in 52, trimming a bit off the sleeve cap and taking a lot of care with the gathering on the necka nd sleeve to get them sitting exactly right.

shirt renovation finale


So I did end up putting in the bust darts and now the shirt is really a lot better. It took an extra half hour because I had to re-hem the back to make it shorter and while I was at it I deepened the front and back waist darts. Here's a final shot of the before and after.
Conclusion? With an hour and half's effort you can turn a crappy cheap shirt into a passable garment. I don't think I'd bother for a lot of clothes, but the real difference here was the starting fabric and the fact that the loose and long design gave me some fabric to play with.

Wednesday, November 12, 2008

shirt renovation

I think most large ladies have a big old boxy sacky shirt in their wardrobe. I’ve had a few. I buy them in moments of weakness but really, I don’t much like wearing them. Too classically fat wear.


This one came from Target a while ago. I was seduced by the pure linen fabric, the go with anything green colour and the reasonable price tag. It promised cool and loose wear for a hot day.

But I’ve never liked that it is overly long (so when I sit for long periods it all bunches and creases up above my hips), that the sleeves are not quite the right length and the cuff on them a wee bit tight, and the utter absence of shape makes the whole thing sack like. Like I say, classic fat wear.

But I recently sewed a linen skirt I absolutely love and since this shirt was the best possible colour match in my wardrobe I set out to rehabilitate it.

I started by adding darts to the front and back so it had at least the impression of a waist. I pinned up about where I thought they should be and then tried the shirt on, adjusted their location and sewed them in.


Next I cut off the cuffs and shortened the sleeves to elbow length. A while ago I was given the tip that eyes are drawn to the horizontal line across your body where your sleeves end, so it is ‘slimming’ to have sleeves finish at your narrowest point. For me this is about elbow length. I did plain old double turned hems because I just didn’t have time to remake cuffs.

Lastly I shortened the whole shirt by a good 10cm. Again, plain old double turned hems.


The whole exercise took about an hour and even if the photos don’t quite show it, it is a vast improvement. It is still a long and loose shirt, but it now has a bit of shape.

Despite my work the shirt still has some fundamental flaws. There are no bust darts, so the front kicks out and hangs short, and the sleeves don’t sit flat against my body because the sleeve cap isn’t well fitted. These are basic fittings that make a great deal of difference to how good a garment looks, and sadly the shortcuts so often taken in plus size and cheaper clothes. Sleeve caps are hard to get right, and because people are plus size for a range of reasons, the differences in fits are much greater than for smaller people.

If I had more time (and the shirt wasn’t so old and thus unworthy of larger scale rehabilitation) I would have unpicked the side seams, added a dart at bust level, sewed the sides up again and evened the bottom hem by taking more off the back than the front. Now that I write that, I really wish I had…actually I think that might be on this weekend’s to do list.

This has given me a bit of motivation for a few more home renovations and I am eying off some other items in the wardrobe. Have you renovated any clothing?

Monday, November 10, 2008

woaw nelly

OK. Clearly I've hit a spot here!

I haven't installed a site meter here (next job!) but I can already tell that large is clocking up a lot of traffic.

How exciting!

But guys, I am really needing some sign ups to make the blog run. I need posts! Despite my appearance of being full of good ideas and having time to implement them I am seriously flying by the seat of my pants.

These pants to be more precise.
Made by me at our last craft weekend in lightweight slightly stretch denim and I love them. The pattern is from Ottobre magazine (2/2007) in size 50. I should have cut a 52, but the 52 tends to be a bit big on me and I figured since the fabric had some give, I should go the smaller size. Next time I'll go the 52 even though I might need to slightly narrow the waist. Next time too, I'll do the fly topstitching in a dark colour even though I like the contrast on the pockets.

The pattern is great otherwise. I used the longer of the two lengths the pattern comes in, and very slightly narrowed the section below the knee which had a very slight flare. It has a wide shaped almost yoke waistband that works really well for me because I have a big and low belly but relatively narrow hips.

I really like Ottobre magazine (I get the kid ones as well as woman) and in Australia I subscribe through Crafty Mamas instead of direct from Ottobre, because Lisa at Crafty Mamas is totally lovely and helpful and because she doesn't roll over your subscription without telling you like the publishers do.

I don't need to alter the Ottobre patterns too much (I take a bit off the the sides of pants and skirts just under the waistband to compensate for the hips thing) and I like enough of their clothes to make it worthwhile subscribing. I really like that they use real looking people as models, including older and larger women, and the clothes suit my lifestyle without being too daggy.

When I have more time (and the day is fast approaching) I'll go back to drafting my own patterns like I used to. If you are considering learning this skill I can but encourage you. For an upfront investment of time to create your base blocks you can make patterns you know will fit you perfectly every time. Magazines like Ottobre still have their place mind you, inspiration and finer pattern details are always a great addition to your base.

I learned drafting here in Melbourne at the CAE and the same class is still taught with the same tutor and he's excellent and there's a range of related classes too. Hmm perhaps time I considered a refresher...

As for the shirt, I'm not really in love with this. It is a hand me down from my sister and it isn't really my colour or general style choice, and yet somehow I seem to wear it anyway. The fabric is nice, a kind of thickish but loose weave naturalish cotton that seems to give more in areas that need it, making it a bit less sack like. Maybe.

Okay gotta go. Please oh please contact me and sign up to do some posts. Even if it is just a little thought or a photo. I'd also be way happy to post questions here on behalf of readers to solicit advice and tips from other readers. So, you know, drop me a line! Now!!

Sunday, November 9, 2008

open for business

Welcome.

I started this blog not because I have a great desire to write it (I'm busy with my main blog over here) but because I want to read it. I'm large, and so is my life and it is a constant disappointment to me that the blogs I read, the forums I search and the pictures I see so often don't apply to me.

My main thing at the moment is fashion. Like lots of plus size people I seem to oscillate between wanting to be invisible and wanting to really stand out. I find it difficult to determine the line between finding what suits me and wearing the clothes I feel my culture dictates fat people should wear. I worry about taking fashion risks and about being a middle age matron before my time (or at any time at all for that matter).

In real life I find feedback and advice, inspiration and community invaluable but often limited. I want to see more images of big people looking good, I want some role models and some advice from people who are unafraid, practical and innovative.

And because I sew a lot of clothes, I want more than just advice on what I wear. I want to talk about sewing experiences for big clothes too. The stylish sewers tips and tricks, the pattern and fabric wins and pitfalls, the tried and true methods and finishes that make people feel good about their clothes.

Knowing where to buy stuff is good too, especially down here in Oz where there are less clothes for plus size people and they are harder to find. Experience with individual brands, retail stores and online buying can really help other people size up their choices.

What I don't want this blog to become is one big whinge about being fat. I'm sure this blog will evolve and there's lots of stuff beside fashion that's worth talking about, but views and life choices about size and diet are too complex and personal for this forum. Neither do I want it become a place where people are harshly judgemental, humiliating and taking delight in other people's bad choices. A little bit of fashion disaster posting is always fun, but the main game is what we like, not what we don't.

I'm going to have to be braver than I usually am to post some of the stuff here I think it would be good to post. Sewing clothes in progress for example would be a great feature but you'll get to see some wobbly bits I usually keep out of view. I hope all those who post here will be brave too and I hope readers will respect that. A lot of us find it hard to step out into the harsh light of public scrutiny, so even those of us seeking feedback want it to be constructive and delivered with sensitivity and humour.

While I hope to post here often and retain the role of administrator for large, this is designed to be a community blog. The more people who post, the better it will be. I encourage you to contact me (soozs.com@gmail.com) if you'd like to be involved, either to become a regular poster, a one-off poster, or even just to email me a tip, link or suggestion for something you'd like to see posted about. Equally, commenting on other people's posts and photos is really important so I urge you to make the extra effort to do so, feedback and community are two way streets.